

If you are researching a whole home humidifier installation, you likely have two questions: Can I do it myself, and how much will it cost? These are the right questions to ask. A whole-house unit is a permanent addition to your HVAC system, and getting it wrong means more than a bad afternoon. It means water where it should not be, electrical headaches, or a furnace that works against itself. This guide walks you through everything you need to know before you pick up a drill or call a contractor. You will learn the differences between humidifier types, what a fair price looks like in 2026, when DIY makes sense, and the steps that keep your installation safe and dry for years.
Table of Contents
- What Is a Whole Home Humidifier? (And Why You Need One)
- Types of Whole Home Humidifiers: Which One Is Right for Your Home?
- Whole Home Humidifier Installation Cost Breakdown (2026)
- DIY vs. Professional Installation: The Honest Truth
- Step-by-Step Whole Home Humidifier Installation Guide (Bypass/Fan-Powered)
- Smart Controls and Leak Detection: The 2026 Upgrade
- Maintenance and Seasonal Tips for Your Whole Home Humidifier
- Frequently Asked Questions
- Conclusion
What Is a Whole Home Humidifier? (And Why You Need One)
A portable humidifier sits in one room and needs refilling every day or two. A whole home humidifier bolts onto your furnace or ductwork and feeds moisture directly into the air circulating through your entire house. It connects to your water line, drains automatically, and runs whenever your HVAC system calls for humidity. You set it once and mostly forget it.
The target for indoor humidity is the same zone most people find comfortable: 30 to 60 percent year-round, with a winter sweet spot of 30 to 40 percent. Many US homes in dry climates or cold-winter regions drop far below that. One homeowner in a northern state measured humidity in the high teens, 17 to 19 percent, during January. At those levels, hardwood floors shrink and gap, static shocks become a daily annoyance, and skin cracks no matter how much lotion you apply.
There is a health angle that competitors rarely address. When nasal passages and throat tissues dry out, they lose some of their ability to trap irritants and pathogens. Restoring humidity to the 30 to 40 percent range can reduce respiratory irritation, ease allergy symptoms, and cut down on the static electricity that turns every doorknob into a small punishment. Wood furniture and musical instruments also last longer when they are not drying out for four months straight.
Types of Whole Home Humidifiers: Which One Is Right for Your Home?
Not all whole-house humidifiers work the same way. The three main types differ in cost, complexity, and how they generate moisture. Choosing the wrong one for your climate or HVAC setup leads to poor performance or an installation that costs more than it should.
Bypass Humidifiers
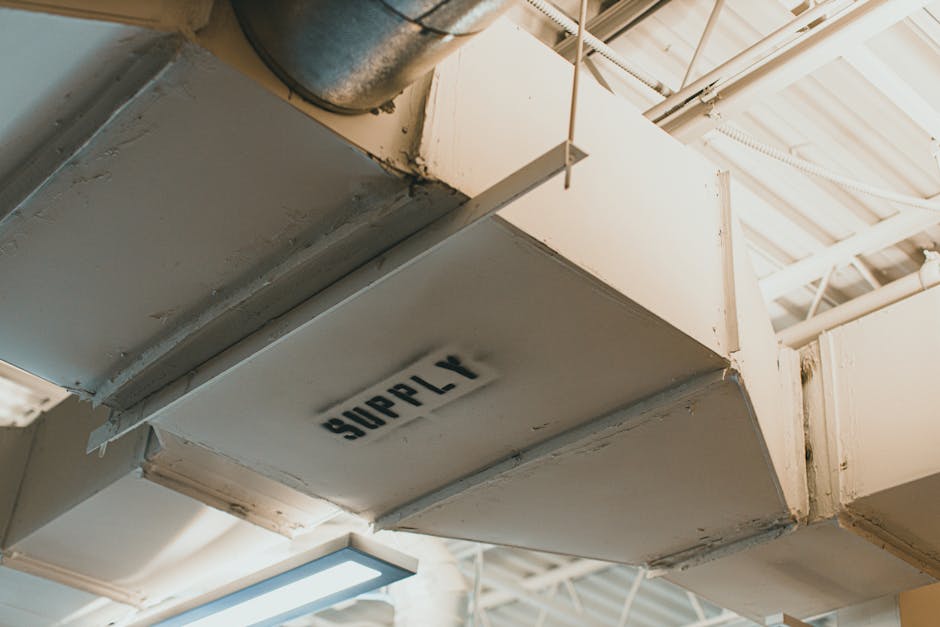
A bypass humidifier is the most common and most affordable type. It mounts on the supply or return duct and uses the furnace blower to push air across a water-soaked evaporative pad. Materials cost between $100 and $200. Installation requires cutting into the ductwork and running a water line and drain. Because it relies on the furnace fan, it only adds humidity when the heat is running. In moderate climates with a standard forced-air furnace, this is often the right choice. It is also the most DIY-friendly option.

Fan-Powered Humidifiers
A fan-powered unit adds a built-in fan that pulls air across the pad independently of the furnace blower. This means it can humidify even when the furnace is not actively heating, which matters in homes with heat pumps that run at lower temperatures or in shoulder seasons when the furnace cycles less often. Materials run $200 to $350. The electrical work is still straightforward, usually a 120V outlet or basic wiring, but the added fan makes the unit slightly more complex to install and maintain.
Steam Humidifiers
Steam humidifiers are the most effective and the most demanding. They heat water to generate steam that is injected directly into the ductwork through a steam wand. Because they create their own humidity independently of furnace operation, they work well with heat pumps, in very large homes, and in extremely dry climates where evaporative units struggle to keep up.
Steam units come with strict clearance requirements. You need a minimum of 16 inches to the right, 4 inches to the left, 16 inches below, and 16 inches from the steam wand to any obstruction. They also require a dedicated electrical circuit, often 120V or 240V, which is a major hurdle for DIYers. A 10-pound-per-hour steam unit is appropriate for a home that needs 6 to 7 pounds of humidity per hour based on square footage, air leakage, and exhaust fan usage. If you are not comfortable running a new circuit from your breaker panel, this is not the unit for you to install yourself.
Whole Home Humidifier Installation Cost Breakdown (2026)
Professional whole home humidifier installation costs between $395 and $734 on average, including labor and materials. The materials alone, the humidifier kit, water line, drain tubing, and fittings, run $100 to $300 depending on the type and brand.
The base quote often leaves out a few items that should be on your radar. A water hammer arrestor, a small device that absorbs the shock when the solenoid valve snaps shut, prevents the banging in your pipes that can happen without one. This Old House specifically recommends installing one on the water line. Expect to add $15 to $30 for the part if your installer does not include it.
A condensate pump may be necessary if your furnace drain is not nearby or sits above grade. Some homes tie the humidifier drain into a condensate pump already serving multiple appliances, mini splits, air conditioners, and the furnace itself. If your existing pump is near capacity, you may need a larger one or a dedicated unit. Budget $50 to $100 for a new condensate pump if needed.
Smart thermostat upgrades are another cost to consider. If you want Ecobee or Nest integration for automatic humidity control based on outdoor temperature, you may need to upgrade your thermostat at the same time. That is not part of a standard humidifier installation quote.
When you search "whole home humidifier installation near me" for local quotes, ask each contractor whether their price includes the water hammer arrestor, the electrical work, and any condensate pump modifications. A lower quote that skips these items is not a better deal.
DIY vs. Professional Installation: The Honest Truth
The search results for this topic create a strange tension. The featured snippet from a major HVAC brand says you absolutely need a professional installer and warns about leaks, over-humidification, and system damage. Meanwhile, YouTube is full of detailed DIY walkthroughs with hundreds of thousands of views. The top video has over 87,000 views, and a second DIY-focused video has more than 38,000. People clearly want to do this themselves, and many do so successfully. The real answer is not yes or no. It is "it depends on the unit and your skill level."
DIY installation is reasonable for bypass and fan-powered humidifiers on a standard forced-air furnace. You need to be comfortable cutting sheet metal, drilling into ductwork, running a water line, and using a multimeter to verify wiring. You need to understand the difference between copper and PEX piping because that distinction matters a great deal. If you have installed a dishwasher or a water filter system, you have a relevant baseline.
There is a critical warning that deserves attention: saddle valves are designed for copper pipe only. The DIY HVAC Guy explicitly warns against using saddle valves on PEX piping. They can leak, and a slow leak inside a furnace closet can destroy flooring and drywall before you notice it. If you have PEX, use a tee fitting with a proper shut-off valve instead.
Professional installation is the right call for steam humidifiers. The electrical work, running a dedicated circuit, meeting clearance requirements, and positioning the steam wand correctly, is not a beginner project. Homes with heat pumps or complex zoning systems also benefit from a pro who understands static pressure and airflow. If you are unsure about any part of your HVAC system, the cost of a pro is cheaper than repairing water damage or replacing a fried control board.
The risks of getting it wrong are real. Improper drainage can send water onto your floor. Over-humidification can cause condensation inside your walls or attic, leading to mold. An incorrectly wired humidistat can run the unit when the furnace is off, saturating the ductwork. None of these are theoretical.
Step-by-Step Whole Home Humidifier Installation Guide (Bypass/Fan-Powered)
This section covers the main steps for installing a bypass or fan-powered humidifier on a standard forced-air furnace. If you are installing a steam unit, the manufacturer's instructions and a licensed electrician should guide you.
Step 1: Gather Tools and Materials
You will need sheet metal screws, tin snips or aviation snips, a drill with bits, a voltage meter, a level, gloves, and safety glasses. Materials include the humidifier kit, a water line kit, a saddle valve if you have copper pipe or a tee fitting with shut-off valve for PEX, drain tubing, a water hammer arrestor, and foil tape for sealing duct openings. Do not skip the gloves. Duct edges are sharp enough to send you to urgent care.
Step 2: Mount the Humidifier
Most bypass and fan-powered units mount on the supply side of the furnace, the hot side, but check your manufacturer's specifications. Use the included template to mark the cutout on the duct. Cut carefully with tin snips. Mount the humidifier housing with sheet metal screws and seal around the edges with foil tape. Make sure the unit is level so water flows across the pad evenly.
Step 3: Connect the Water Supply
Install the water hammer arrestor first, between the water line and the humidifier solenoid valve. This prevents the pipe banging that happens when the valve closes quickly. If you have copper pipe, a saddle valve is acceptable when installed correctly. If you have PEX piping, do not use a saddle valve. Cut the PEX and install a tee fitting with a dedicated shut-off valve, then run the water line from there. Turn the water on slowly and check every connection before moving on.
Step 4: Run the Drain Line
The drain line carries excess water away from the humidifier. It must slope downward continuously with no dips or traps. Tie it into the furnace condensate pump if one exists, or run it to a floor drain. If you are using a condensate pump that already serves other appliances, verify it can handle the additional flow. One installer noted tying a humidifier drain into a pump that already handled four mini splits and the furnace condensate. That pump was working hard. If in doubt, install a dedicated pump.
Step 5: Wire the Control and Test
Connect the humidistat or smart controller according to the wiring diagram. Most units wire into the furnace control board so the humidifier only runs when the blower is active. If you are using an Ecobee or Nest thermostat for humidity control, follow the thermostat manufacturer's instructions for accessory wiring. Once everything is connected, turn on the water, set the humidistat to call for humidity, and watch the unit cycle. Listen for water hammer. Check every fitting for drips. Let it run for a full cycle and check again.
Smart Controls and Leak Detection: The 2026 Upgrade
Most installation guides stop at the mechanical steps and ignore what modern controls can do. That is a missed opportunity. Smart thermostats like Ecobee and Nest can manage humidity based on outdoor temperature, a feature called frost control. When outdoor temperatures drop, the thermostat automatically lowers the indoor humidity target to prevent condensation on windows and inside walls. This protects your home without requiring you to adjust settings manually through the winter.
Leak detection is another upgrade worth considering. Some modern humidifier controllers can detect water on the floor or inside the unit and automatically shut off the water valve. This prevents the kind of slow leak that can ruin a finished basement floor before anyone notices. The This Old House installation video highlights this feature as a worthwhile addition.
Air quality monitoring rounds out the smart home integration. The DIY HVAC Guy recommends an Alexa-compatible air quality monitor that tracks humidity, temperature, particulate matter, carbon monoxide, and volatile organic compounds. Having real-time humidity data in every room helps you fine-tune the system and catch problems like a stuck valve or a clogged pad before they become obvious.
Maintenance and Seasonal Tips for Your Whole Home Humidifier
No competitor content covers ongoing maintenance, yet a neglected humidifier becomes a liability. The evaporative pad in bypass and fan-powered units collects mineral deposits and eventually grows mold if left too long. Replace the pad every one to two years, or annually if you have hard water. Steam units need descaling on a similar schedule to remove mineral buildup from the tank.
Seasonal operation matters too. In spring, turn off the water supply to the humidifier and set the humidistat to "Off" or "Summer" mode. Leaving the water on and the unit active during air conditioning season can cause condensation on the cooling coils and inside the ductwork, which leads to mold and musty odors when you switch back to cooling.
In winter, target 30 to 40 percent humidity. If you see condensation on your windows on cold mornings, dial the humidistat down. Window condensation means the humidity is high enough to potentially condense inside your walls, where you cannot see it. Lower the setting by a few percentage points and check again the next cold morning.
Frequently Asked Questions
Can I install a whole home humidifier myself?
Yes, for bypass and fan-powered units if you have basic HVAC and plumbing skills, understand your pipe material, and follow the manufacturer's instructions. No, for steam units unless you are a licensed electrician comfortable running a dedicated circuit.
How long does installation take?
A professional installation typically takes 2 to 4 hours. A careful DIY installation of a bypass or fan-powered unit takes 3 to 6 hours, depending on how accessible your furnace and water lines are.
Will a whole home humidifier increase my energy bill?
Steam humidifiers draw significant power and will increase your electric bill noticeably. Bypass units use minimal electricity because they rely on the furnace blower. However, proper humidity makes the air feel warmer, which often allows you to lower your thermostat by 1 to 2 degrees Fahrenheit and offset some of the operating cost.
Conclusion
A whole home humidifier installation is a project that rewards honest self-assessment. Match the unit type to your climate and HVAC system. Budget for the hidden costs like a water hammer arrestor and a condensate pump. If you have a standard furnace and choose a bypass or fan-powered unit, DIY is within reach for a handy homeowner who respects the difference between copper and PEX. If you need a steam unit or have a complex system, hire a pro. Before you buy anything, measure your home's square footage and check your furnace type. If you decide to hire a contractor, search for "whole home humidifier installation" plus your city name and ask the right questions when the quotes come in.